How to set up Google Analytics for this theme
A brief note on GDPR
By default, the way Google Analytics is set up for this theme will allow you to use it in a GDPR-friendly way (meaning, IP anonymization is on and ad features are off). This is also assuming you have turned off "Account Data Sharing Settings" for the account you're using.
If you want to enable the collection of more data (whether by Google Analytics or other third-party tools), you'll probably need to implement your own cookie banner and consent tracking.
I am not a lawyer, you are responsible for ensuring your own compliance.
Here's how to set up Google Analytics for this theme.
Step 1. Open Google Analytics' Admin section
Navigate to Google Analytics and click the "Admin" button in the left navigation menu.

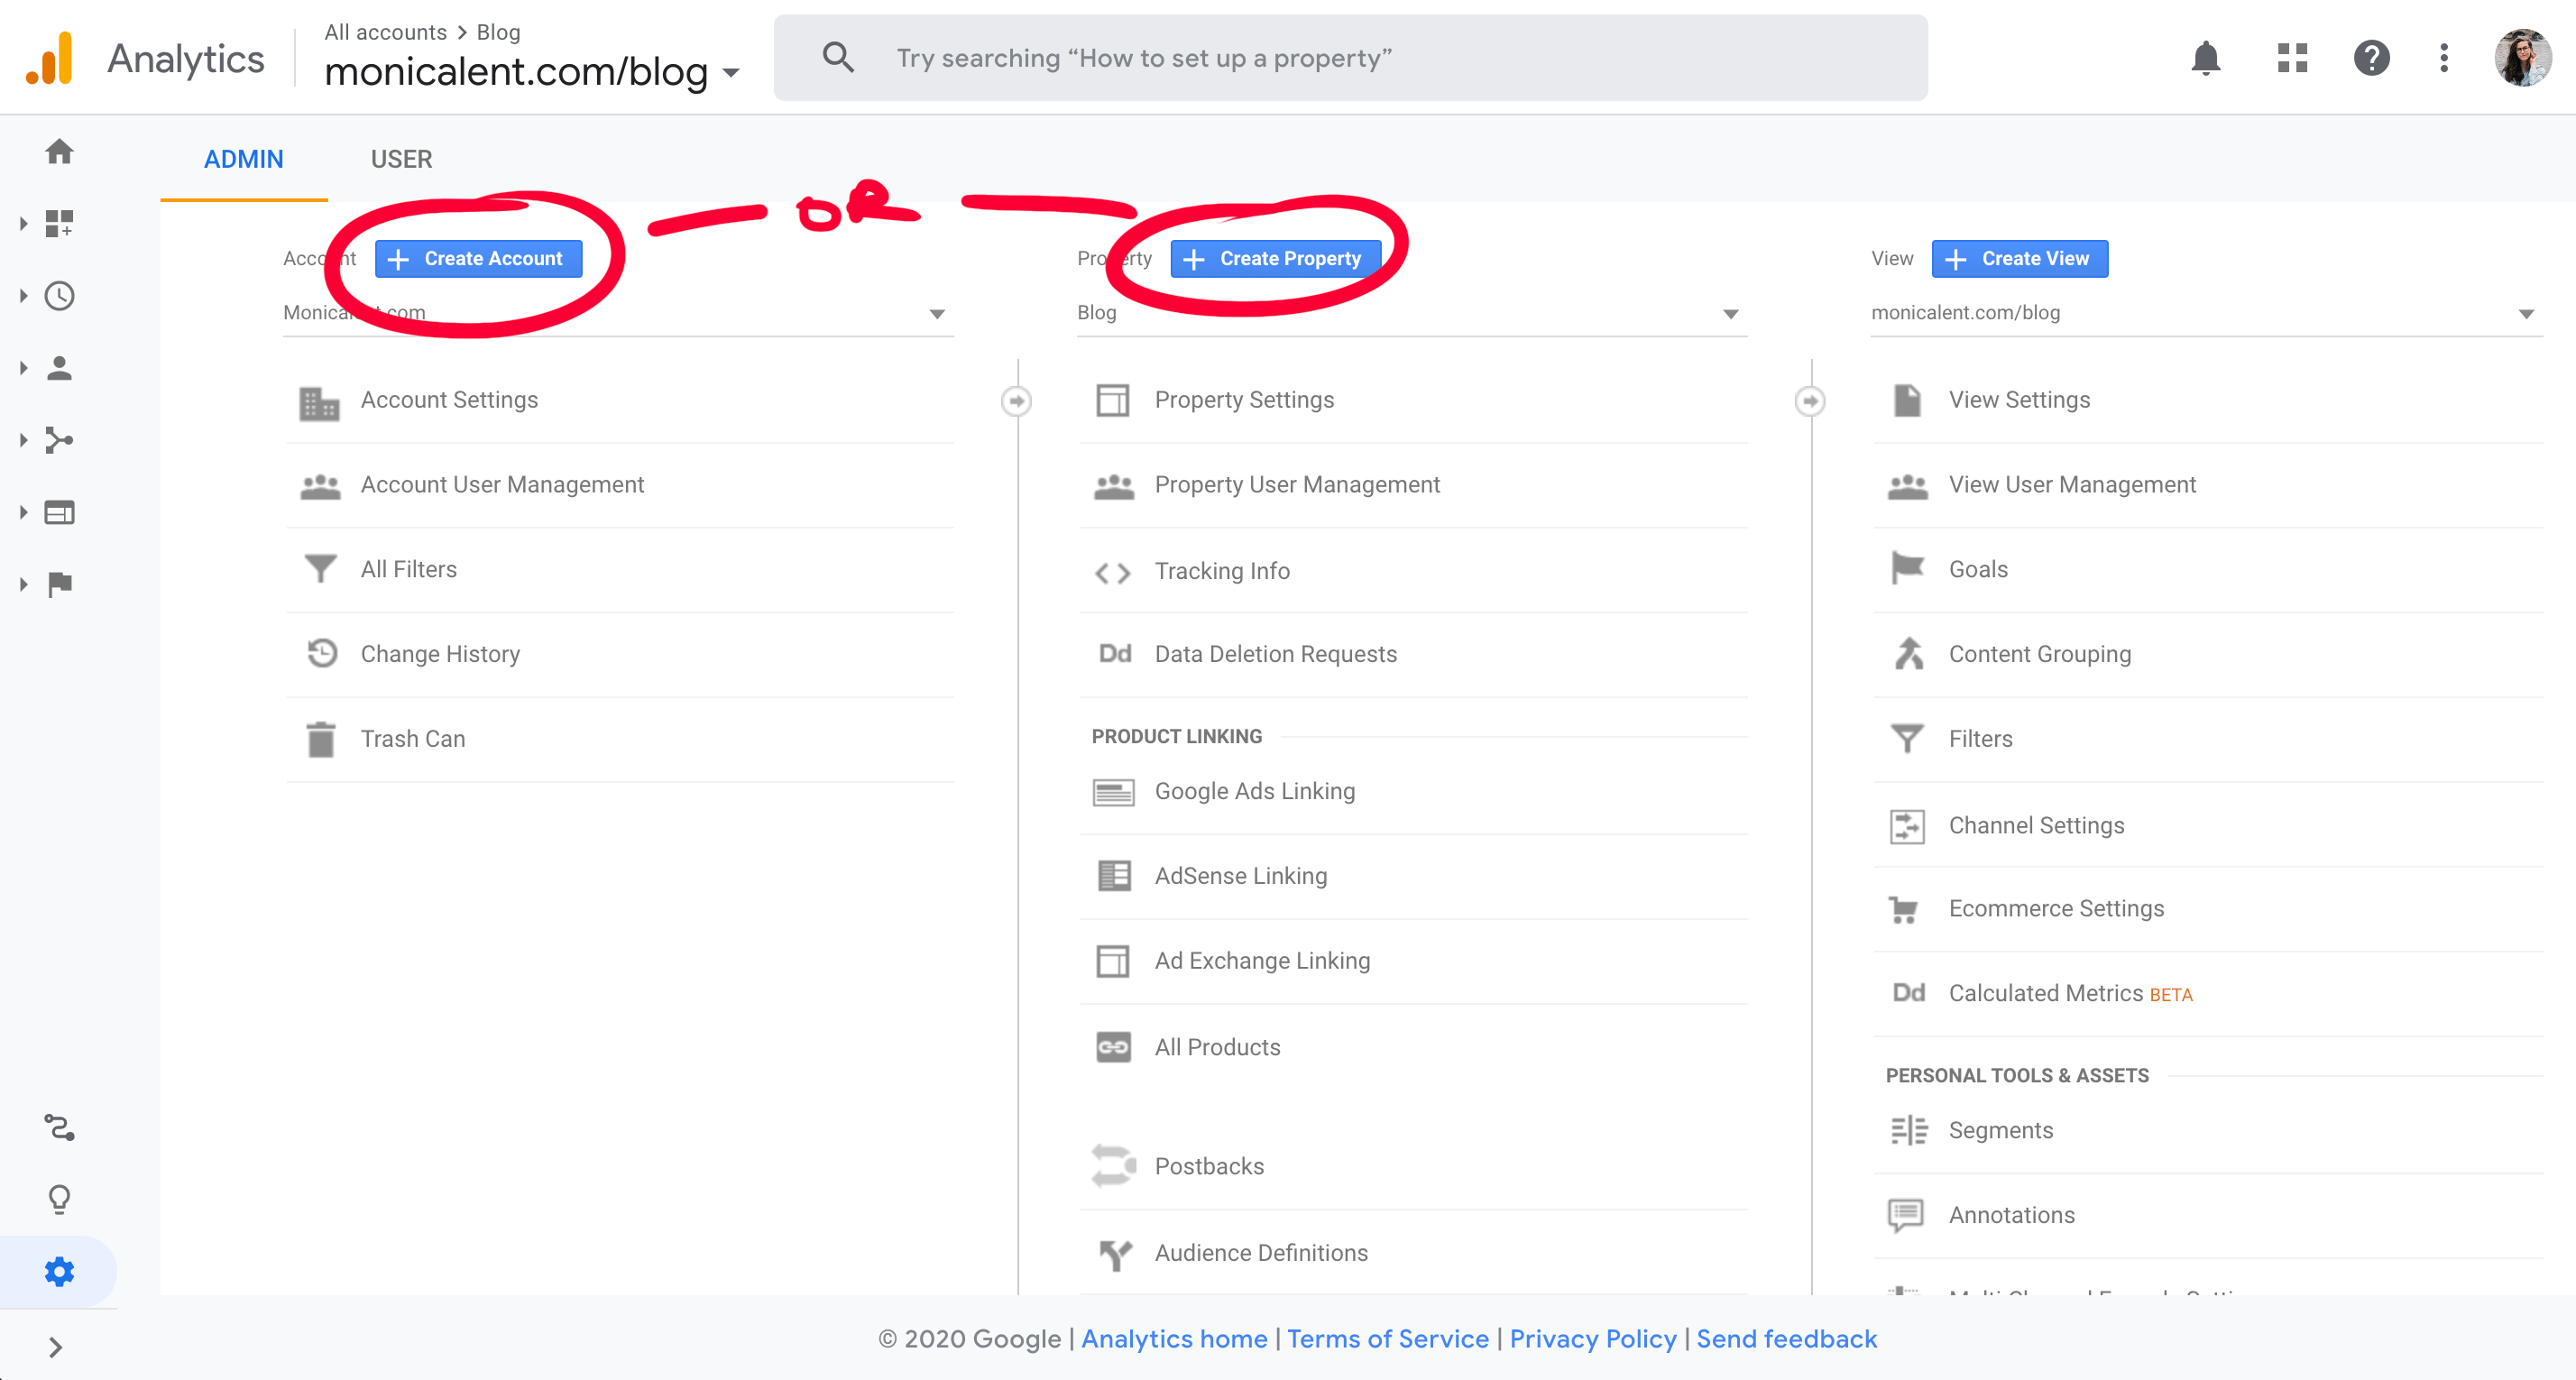
Step 2. Create a new Account or Property
Most likely, you just want a new property because the Help Center you're creating is connected to an existing product.
In that case, choose "Create Property". Otherwise, choose "Create Account".
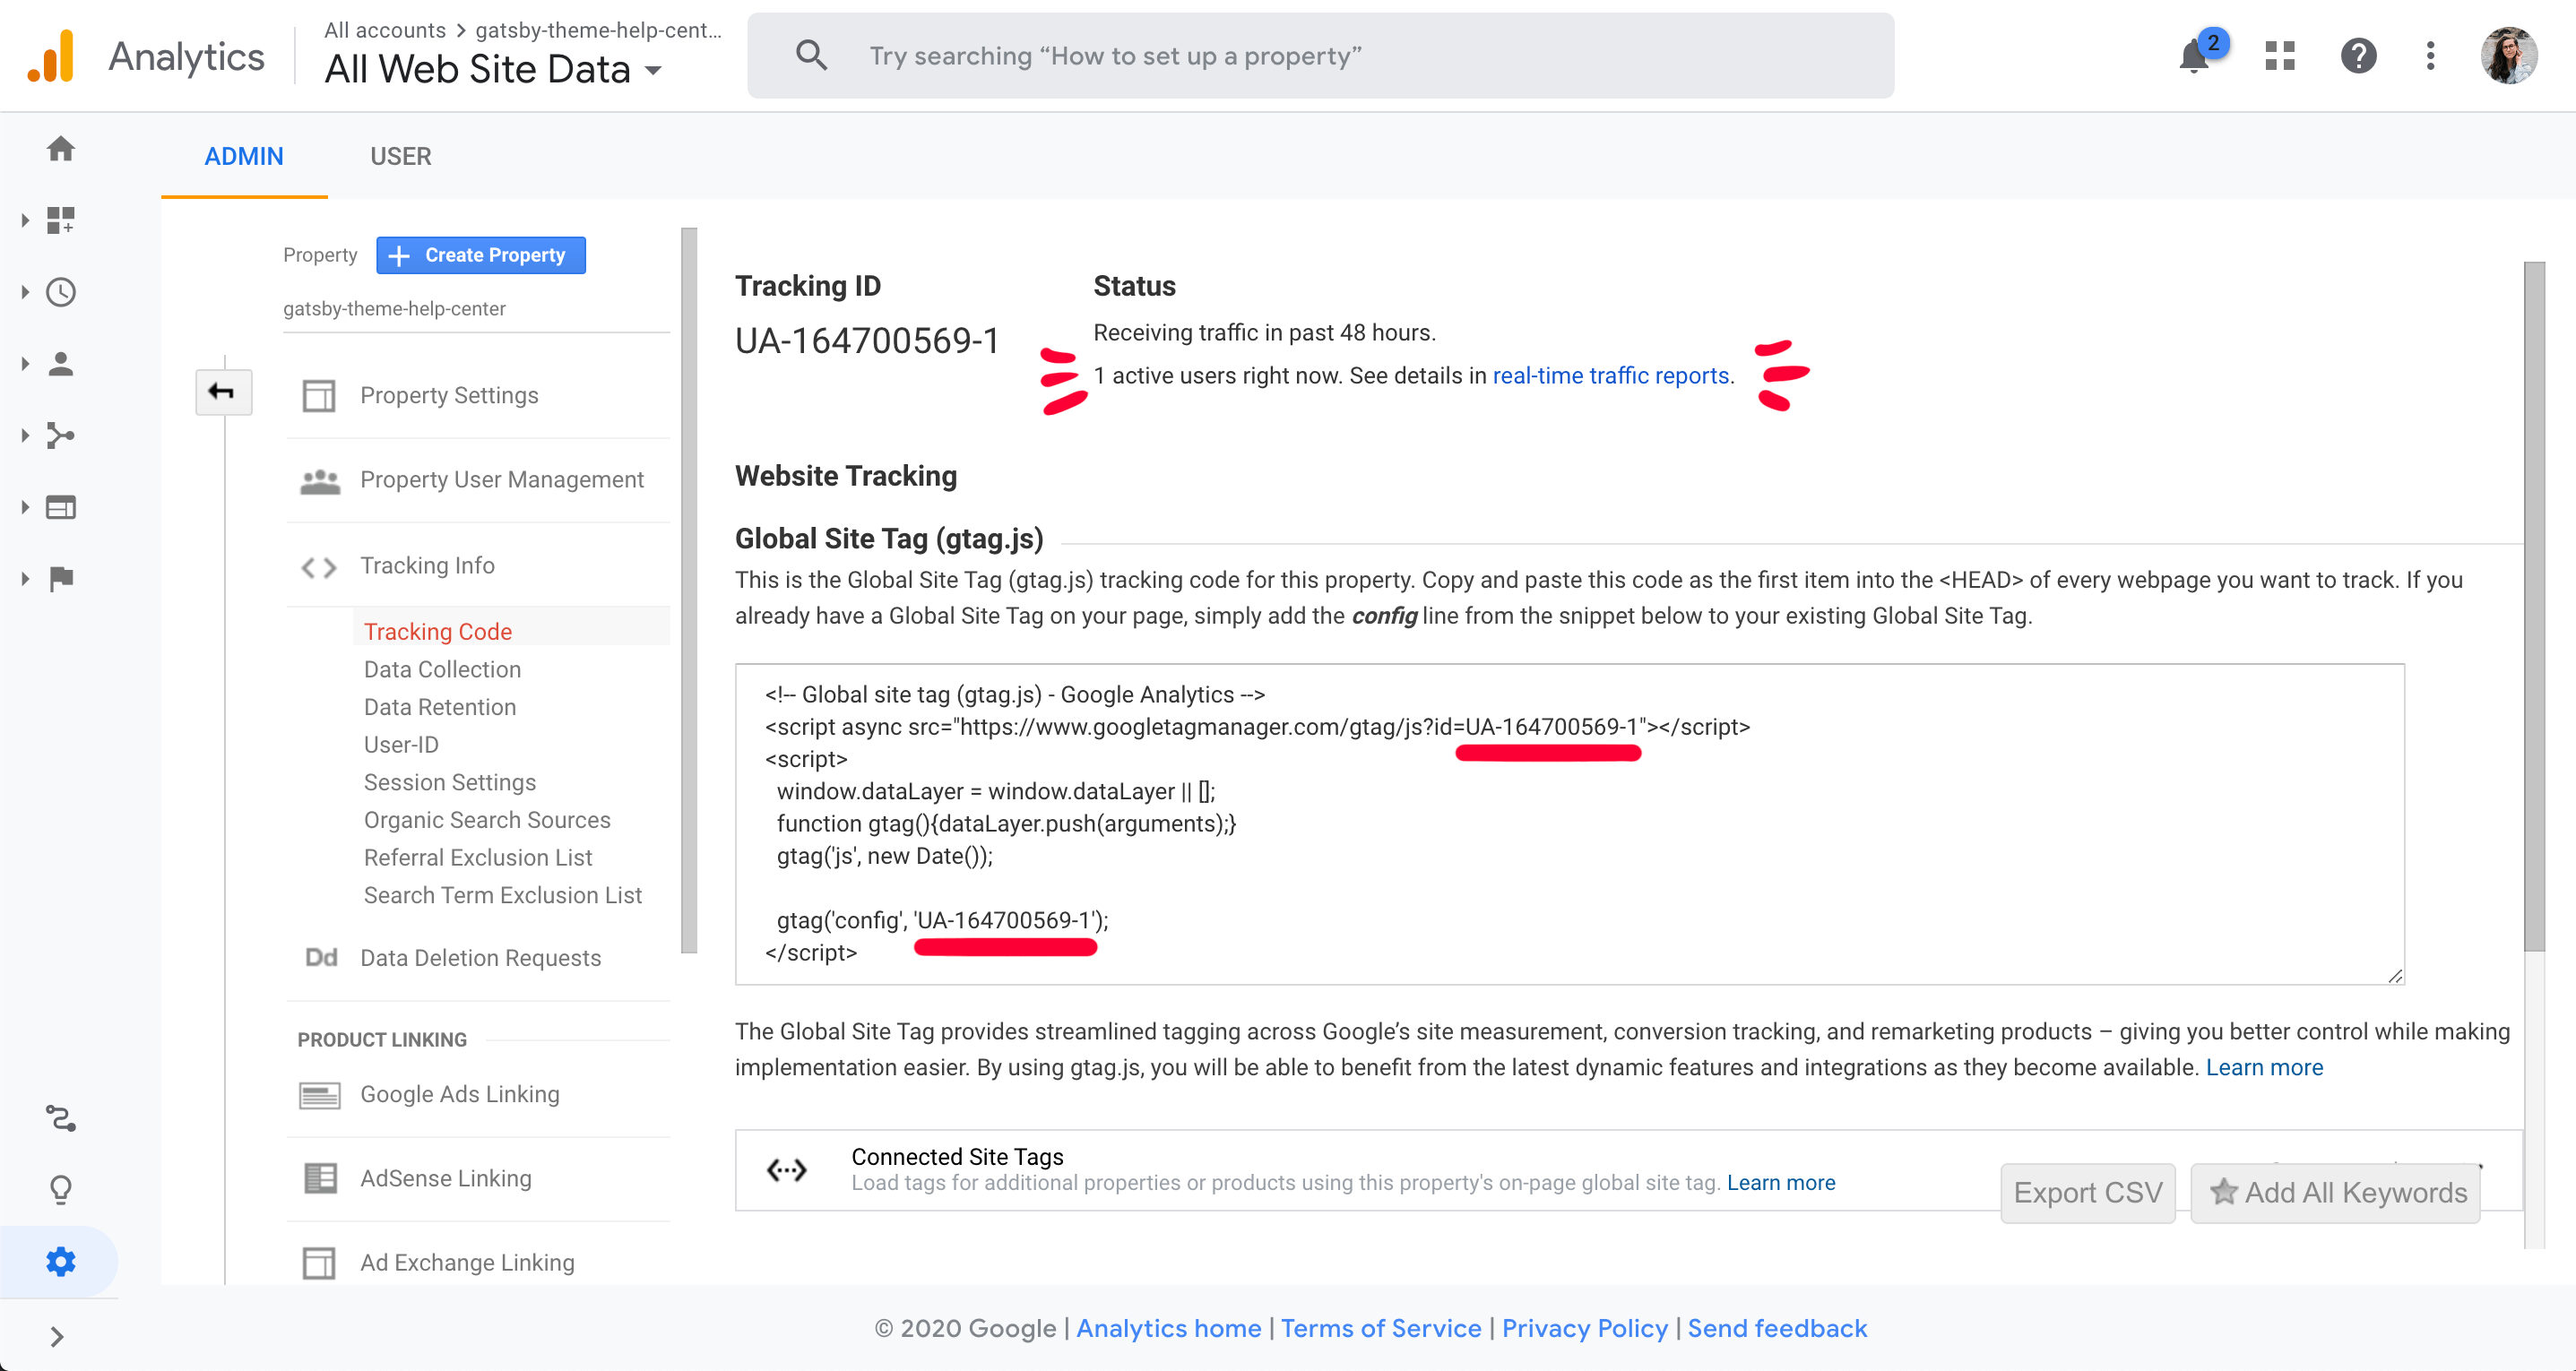
Step 3. Copy the Tracking IDs into your gatsby-config
You will get a snippet from Google called the "Global Site Tag (gtag.js)", which looks something like this:
<!-- Global site tag (gtag.js) - Google Analytics -->
<script
async
src="https://www.googletagmanager.com/gtag/js?id=UA-164700569-1"
></script>
<script>
window.dataLayer = window.dataLayer || [];
function gtag() {
dataLayer.push(arguments);
}
gtag('js', new Date());
gtag('config', 'UA-164700569-3');
</script>These IDs may be the same, or they may be different (for instance when you track multiple properties under the same account).
The value after ?id= is the googleTagManagerId:
<script
  async
  src="https://www.googletagmanager.com/gtag/js?id=YOUR_TAG_MANAGER_ID_HERE"
></script>
And the ID being passed as the gtag config is the googleAnalyticsMeasurementId:
gtag('config', 'YOUR_GTAG_CONFIGURATION_ID_HERE');Once you've found these IDs, provide them in your gatsby-config.js file:
module.exports = {
  plugins: [
    {
      resolve: '@mlent/gatsby-theme-help-center',
      options: {
        basePath: '/'
      }
    }
  ],
  siteMetadata: {
    // ...your other configurations here
    googleTagManagerId: 'YOUR_TAG_MANAGER_ID_HERE',
    googleAnalyticsMeasurementId: 'YOUR_GTAG_CONFIGURATION_ID_HERE'
  }
};
Once you've successfully set up Google Analytics, you will see the page change to saying "1 active users right now" as seen in the screenshot below.